

Creating puff pastry, or pâte feuilletée, is a rewarding process that transforms simple ingredients into a culinary masterpiece. Known for its delicate layers and buttery texture, puff pastry is the foundation of countless sweet and savory dishes. This guide delves into the essential techniques, tools, and tips to craft flawless puff pastry from scratch.
Historical Origins of Puff Pastry
The origins of puff pastry can be traced to the Renaissance in France during the 16th century, where the technique of laminating dough with butter was perfected. Earlier influences, however, stem from ancient layered dough techniques seen in Greek, Roman, and Turkish cuisines, particularly in Asia Minor.
- Ancient Precursors: Greeks and Romans used oil-based layered doughs, which inspired later culinary traditions.
- Asia Minor Influence: Turkish cuisine, particularly with baklava, employed thin layers of dough separated with fat (often oil or clarified butter). This technique laid the groundwork for modern puff pastry development.
- Renaissance Refinement: The true lamination process, where butter is folded into dough to create alternating layers, emerged in France and became the hallmark of puff pastry.
Traditional Uses of Puff Pastry
Puff pastry’s versatility has made it a foundation for both sweet and savory dishes, as well as a staple in festive and everyday baking.
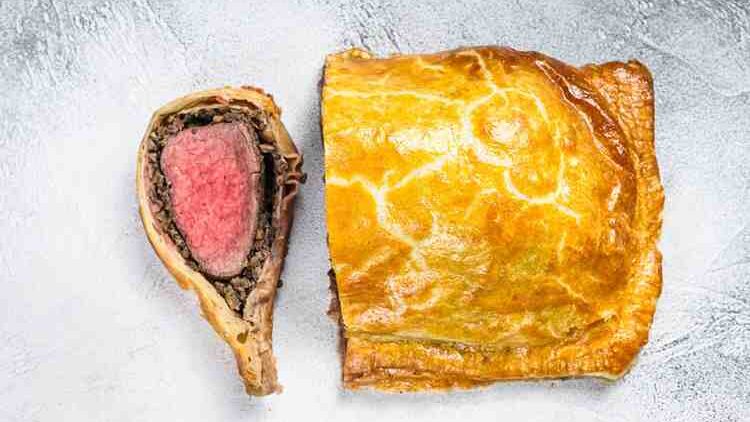
- Savory Dishes:
- Used in recipes like vol-au-vent and beef Wellington.
- Encases meats, cheeses, and vegetables for pies and turnovers.
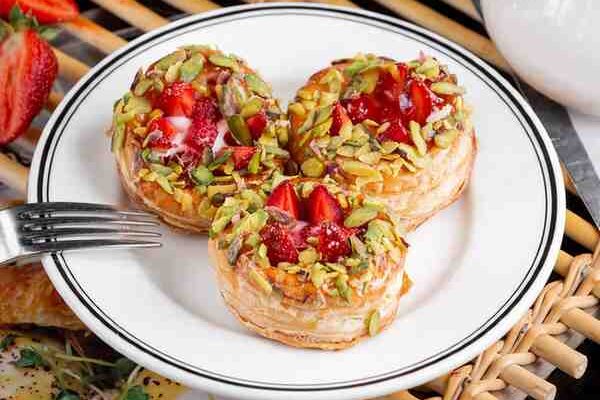
- Sweet Pastries:
- Forms the base for mille-feuille, palmiers, and other desserts.
- Often paired with creams, custards, and fruit.
- Festive Baking:
- Key ingredient in France’s Galette des Rois for Epiphany.
- Central to holiday treats in various cultures.
- Everyday Use:
- Popular for tarts, pies, and simple pastries.
- A go-to for home bakers and professionals alike.
Iconic French Pastries Made with Puff Pastry
Puff pastry is a cornerstone of French cuisine, celebrated for its flaky layers and buttery texture. It serves as the base for a variety of iconic pastries, both sweet and savory, each reflecting the artistry and regional flavors of France.
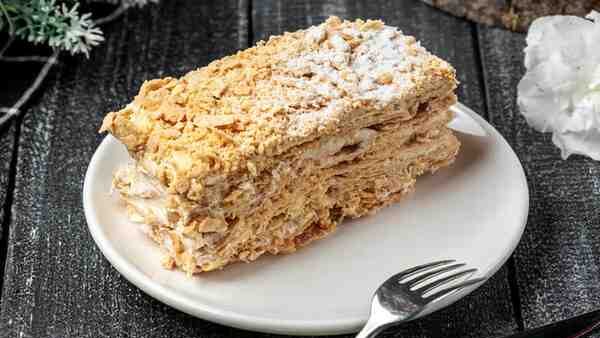
Mille-Feuille (Napoleon)
- Also known as Napoleon, this classic dessert consists of delicate layers of puff pastry filled with rich pastry cream and topped with icing or fondant.
- It’s a symbol of French patisserie, showcasing the artistry and precision of puff pastry.
Vol-au-Vent (Vol-au-Vent)
- A savory puff pastry shell that is hollowed out and filled with creamy chicken, seafood, or mushroom-based fillings.
- Often served as an appetizer or main course in French fine dining.
Chausson aux Pommes (Apple Turnover)
- A crescent-shaped pastry filled with sweetened applesauce.
- A popular choice for breakfast or as a snack, celebrated for its flaky, buttery crust.
Palmiers (Elephant Ears or Palm Leaves)
- Sometimes called “elephant ears,” these pastries are made by folding puff pastry with sugar and baking until caramelized and crispy.
- A simple yet elegant treat, often paired with coffee or tea.
Pâté Lorrain (Lorraine Meat Pie)
- A savory puff pastry filled with marinated pork and veal, originating in the Lorraine region of France.
- Reflects the rustic and hearty side of French cuisine, perfect for showcasing the adaptability of puff pastry.
What Makes Puff Pastry Special?
Puff pastry is a laminated dough that relies on precise techniques to achieve its signature flaky structure. The layers are formed by alternating dough (détrempe) and butter (beurrage), creating a pastry that puffs dramatically when baked.
Key Characteristics of Puff Pastry
- Flaky Layers: Achieved through the lamination process.
- Buttery Flavor: High-fat content from quality butter.
- Crisp Texture: Perfect for tarts, pastries, and savory dishes.
The process may seem complex, but with patience and attention to detail, anyone can master puff pastry.
Ingredients for Perfect Puff Pastry
Each component in puff pastry contributes significantly to its flaky texture and rich flavor.
1. Flour
- Type: Use all-purpose flour for a balanced protein content.
- Quantity: 2 1/2 cups (320 grams).
2. Butter
- Type: Opt for unsalted, high-fat butter (preferably European-style) to achieve distinct layers.
- Quantity: 1 1/4 cups (2 1/2 sticks or 285 grams).
- Preparation: Chill the butter until firm but pliable.
3. Water
- Type: Use ice-cold water to prevent premature gluten development.
- Quantity: 2/3 cup (160 milliliters).
4. Salt
- Purpose: Enhances overall flavor.
- Quantity: 1 teaspoon.
Optional Additions:
- Lemon Juice or Vinegar: A teaspoon can be added to the water to tenderize the dough, making it more manageable.
Essential Tools for Puff Pastry
Equipping yourself with the right tools ensures efficiency and precision in the puff pastry-making process.
Must-Have Tools:
- Rolling Pin: A sturdy, smooth rolling pin is essential for even dough thickness.
- Pastry Scraper: Assists in handling and folding the dough without warming it.
- Ruler: Ensures accurate measurements for consistent layers.
Optional Tools:
- Pastry Mat: Provides a non-stick surface for rolling out the dough.
- Bench Scraper: Useful for shaping and lifting the dough.
- Parchment Paper: Prevents sticking and facilitates easy cleanup.
Preparing the Dough: The Détrempe
The base dough, known as the détrempe, serves as the foundation for puff pastry. Proper preparation is crucial for achieving the desired flakiness.
Step 1: Mixing the Dough
- Combine Dry Ingredients: In a large bowl, whisk together the flour and salt.
- Incorporate Butter: Cut 4 tablespoons (55 grams) of the chilled butter into small pieces and rub into the flour mixture until it resembles coarse crumbs.
- Add Water: Gradually pour in the ice-cold water (mixed with optional lemon juice or vinegar), stirring gently until the dough begins to come together.
- Form the Dough: Transfer the mixture onto a lightly floured surface and gently knead just until a cohesive dough forms. Avoid overmixing to prevent gluten overdevelopment.
Step 2: Resting the Dough
- Wrap and Chill: Shape the dough into a flat rectangle, wrap it tightly in plastic wrap, and refrigerate for at least 30 minutes. This resting period relaxes the gluten, facilitating easier rolling and layering.
Preparing the Butter Block: The Beurrage
The butter block, or beurrage, is integral to creating the puff pastry’s signature layers.
Step 1: Shaping the Butter Block
- Prepare Butter: Place the remaining chilled butter (1 cup or 230 grams) between two sheets of parchment paper.
- Flatten: Using a rolling pin, pound and roll the butter into a square approximately 1/2 inch (1.25 cm) thick.
- Chill: Ensure the butter is firm but pliable. If it becomes too soft, refrigerate briefly before proceeding.
Step 2: Ensuring Proper Temperature
- Temperature Alignment: It’s crucial that both the dough and butter are at similar, cool temperatures to prevent the butter from melting or breaking through the dough during lamination.
Laminating the Dough: Building Flaky Layers
Lamination involves folding the butter into the dough multiple times to create thin layers that puff up during baking.
Step 1: Enclosing the Butter
- Roll Out Dough: On a lightly floured surface, roll the rested dough into a rectangle twice the size of the butter block.
- Place Butter: Position the butter block on one half of the dough, leaving a small border around the edges.
- Fold: Fold the other half of the dough over the butter, pressing the edges to seal completely.
Step 2: Performing Turns
- First Roll and Fold:
- Roll Out: Gently roll the dough into a long rectangle, maintaining even thickness.
- Fold: Fold the dough into thirds, like a letter. This completes one “turn.”
- Chill: Wrap the dough in plastic wrap and refrigerate for 30 minutes to relax and firm up.
- Repeat: Perform at least four turns, chilling the dough between each to maintain the proper temperature and consistency.
Troubleshooting Puff Pastry Problems
Even with careful preparation, challenges can arise. Here are common issues and solutions:
- Butter Leaking: If butter melts and leaks out during baking, ensure the dough and butter were adequately chilled during preparation.
- Dough Shrinking: Shrinking can result from overworking the dough or insufficient resting periods. Allow the dough to rest as directed to relax the gluten.
- Uneven Puffing: This may occur if the butter wasn’t evenly distributed. Ensure consistent rolling and folding techniques during lamination.
Final Tips for Perfect Puff Pastry
for Successful Puff Pastry
| Step | Key Tips | Why It Matters |
|---|---|---|
| Ingredient Prep | Use cold, high-fat butter and chilled flour. | Prevents butter from melting and ensures distinct layers. |
| Mixing the Dough | Combine ingredients just until incorporated; avoid overmixing. | Keeps gluten development minimal, resulting in a tender texture. |
| Rolling the Dough | Roll evenly and rotate frequently. Use light, even pressure. | Ensures consistent layers and prevents tearing. |
| Folding (Turns) | Perform 4–6 turns, chilling the dough between each fold for 30 minutes. | Creates the laminated layers needed for puffing. |
| Temperature Control | Keep butter and dough at the same cool temperature throughout the process. | Maintains the integrity of layers during rolling and folding. |
| Shaping | Cut with sharp tools and avoid stretching the dough. | Prevents shrinkage and ensures clean edges for even rising. |
| Chilling Before Baking | Refrigerate shaped pastry for 20–30 minutes before baking. | Reduces the risk of butter leakage and helps maintain shape during baking. |
| Baking | Preheat oven to 400–425°F (200–220°C). Bake on parchment-lined trays. | High heat creates steam for maximum puffing. |
| Resting Between Steps | Allow the dough to rest at every stage. | Relaxes gluten and prevents shrinkage or cracking during rolling and baking. |
| Troubleshooting | Fix cracks by patching with scraps. Chill dough if butter softens. | Ensures consistent, professional-quality results every time. |